Sunday, 25 May 2014

Chocolate Hazelnut Tart

Trawling through Twitter last Sunday afternoon, I discovered it was World Baking Day. Of course, I couldn't let an opportunity to bake pass me by, so I got out my cookbooks and started searching for inspiration. I eventually decided upon a chocolate and hazelnut tart.


This recipe came from The Great British Bake Off: Everyday and caught my eye when I first got the book as a Christmas present last year. I was delighted that I finally got and opportunity to try it out.


Pastry is something that I'm not hugely confident with, but I am determined to overcome this. Apart from a few burnt edges which I trimmed off, this was actually pretty alright. It was really buttery crumbly, just the way I like.


The chocolate hazelnut ganache filling is so rich and a tiny sliver will give you your chocolate fix for the day. It tastes just like Ferrero Rocher. Yum!
 

Chocolate Hazelnut Tart

For the pastry:
200g plain flour 
Pinch of salt
80g icing sugar
100g unsalted butter, chilled and diced
4 medium egg yolks
1/2 tsp vanilla extract

Put the flour, salt and icing sugar into a bowl and give it a quick whisk. Add the butter and rub together until the mixture looks like fine bread crumbs. Add the egg yolks and beat until just combined, then use your hands to mold the dough into a ball. Remove from the bowl and flatten into a disk before covering with clingfilm. Chill for 30 minutes. 

Lightly dust a work surface with flour, then roll out the pastry to a circle large enough to cover your tart tin. Press into the tin. Prick the base with a fork, then chill for a further 15 minutes.

Heat your oven to 180ºC. Bake the pastry case 'blind' by lining with a crumbled up piece of greaseproof paper and filling with baking beans. Place in the heated oven and bake for 12-15 minutes until the pastry is firm. Remove the baking beans, turn down the temperature to 160ºC and bake for a further 7-9 minutes. Remove from the oven and set the tin on a wire rack to cool. 

For the filling:
250g chopped roasted hazelnuts
400ml double cream
150g milk chocolate
150g dark chocolate
1/4 tsp sea salt

Heat the cream in a medium pan until steaming hot. Remove from the heat and stir in 50g of the hazelnuts. Cover and leave to infuse for at least 45 minutes (up to 2 hours if possible), stirring from time to time.

Break up the chocolate and put into a heatproof bowl. Gently reheat the cream/mixture until steaming hot and then pour through a sieve onto the chocolate. Stir until melted and smooth. Discard the nuts in the sieve. Add the remaining nuts and salt to the mixture and beat well for about a minute until the mixture is thick. 

Scrape the mixture into the pastry case, cover with clingfilm and chill for 20 minutes to firm up. Leave at room temperature for 20 minutes before serving. 

Sunday, 18 May 2014

Chocolate Flowerpot Cake

Thursday was mum's birthday and of course I couldn't let the occasion past without making a cake. The only problem was, I had about two hours over two days to make it happen so I would need to come up with a game plan. I decided to bake the cake the first day and then decorate it the second. Somehow, I managed to get it all done with about 30 minutes to spare.


The cake itself is a pretty simple one. I baked it in a giant cupcake tin (similar to this one) to help with the shape of the flowerpot which definitely helped with the timing issue, even if it wasn't quite as tall as I would have like. I then covered the cake in a thin layer of buttercream, before decorating with fondant, crushed up Oreos for soil and finally some buttercream grass to hide any messy edges.


Chocolate Cake
175g unsalted butter, softened
175g golden caster sugar
3 eggs, beaten
3 tbsp golden syrup
40g ground almonds
175g self-raising flour
Pinch of salt
40g cocoa powder
2 tbsp water

Preheat the oven to 180ºC and line your cupcake tin. Place the butter and sugar in a bowl and beat until light and fluffy Gradually, add in the eggs. Stir in the golden syrup and ground almonds. Sift the flour, salt and cocoa powder in a separate bowl, before folding into the mixture. If needed, add in the water to make a dropping consistency. Spoon three quarters of the mixture into the base section of the cupcake tin. Bake for 20 minutes. Remove from the oven and add the remaining mixture to the top part of the cupcake tin and bake for a further 15 minutes, or until a skewer comes out clean. Leave to cool on a wire rack. 

Chocolate Buttercream
2 tbsp hot water
2 tbsp cocoa powder
150g unsalted butter, softened
225g icing sugar

Blend the water and cocoa powder together to make a paste. Beat the butter until light and fluffy. Add in half the icing sugar and the cocoa powder paste an beat. Add in the remaining sugar and beat until smooth. 

You will also need
About 6-8 Oreos
Different coloured fondant
A little bit of extra buttercream

When the cake has cooled completely, sandwich the two sections together with some buttercream. Cover the whole cake in a thin layer of buttercream. Break up some oreos (just the biscuit part) and press into the top of the cake to create the soil. Cover the side of the cake in brown fondant to create the flowerpot. Then add whatever leaves and flowers you want, using either leftover buttercream or edible glue to secure. I used a little bit of yellow buttercream to create the centre of the flowers, but you could use extra fondant instead. I also wanted to cover up the rough edges at the bottom of the cake so piped on some grass. A ribbon would also do the trick.

Sunday, 11 May 2014

Wizard of Oz Rainbow Cake

This week was my cousin's 30th birthday. Ever since I remember, she has been obsessed with the Wizard of Oz. So, of course it was the first thing I thought of when I was planning her cake.


When it came to the actual cake, there was only one option. It had to be a (somewhere over the) rainbow cake! This was my first ever seven layered rainbow cake. I wanted to keep the layers nice and thin, so used a five layer recipe and then divided it into seven colours. I then used a very thin layer of buttercream to cover the cake. I loved how it turned out.


For the decoration, I decided to give fondant another go. I know it is not my strong point, but practice makes perfect, right? Well I've a lot of practice to go, but some strategically placed yellow brick roads and poppy fields covered any holes and made this cake look pretty presentable.


But the most important part is, the birthday girl loved it! And she sent me this snap of when she cut it open. It looks pretty awesome, if I do say so myself.


(adapted from Raspberri Cupcakes)
355g plain flour
1 tbsp baking powder
1/2 tsp salt
225ml milk
2 tsp vanilla extract
400g caster sugar
225g butter, softened
4 eggs
Food colouring

Preheat oven to 180ºC and grease and line your tins. I only had 2 round tins, so had to bake this in batches. Combine flour, baking powder and salt in a bowl and set aside. Mix milk and vanilla together in a measuring jug and set aside. Using an electric mixer, beat sugar and butter in a large bowl until pale and creamy. Add eggs one at a time, beating well after each addition. Add flour mix and milk mixture, beginning and ending with flour mixture (Add 1/4 of the dry mixture followed by 1/3 of the wet mixture at a time). Beat until smooth, occasionally scraping bowl with a spatula. Divide mixture evenly into 7 bowls and add a different colour of the rainbow to each bowl. Pour batter into prepared tins and bake each layer for about 10 minutes or until a skewer into the centre comes out clean. They're very thin layers so keep a careful eye on them. Cool on a wire rack. 

Vanilla Buttercream
150g unsalted butter, softened
225g icing sugar
2 tbsp hot water
1 tsp vanilla extract

Beat the butter until light and fluffy. Add in half the icing sugar, half the water and the vanilla. Beat until combined. Add in the remaining icing sugar and water (if needed). Beat until combined.

Sunday, 4 May 2014

1st Birthday Cake and Cupcakes

Another commissioned cake this week. Without sounding completely cheesy, it feels really great when someone asks me to make an cake for a special occasion of theirs, and I always jump at the opportunity. This week is another 1st birthday cake, for one of the girls in work's son. 


As usual, I went straight to Pinterst for ideas, and in the end we decided upon a giant number 1 covered in Smarties. I turned to my favourite chocolate cake recipe (previously seen here and here), printed off a giant number 1 template and set to work.


I loved working on this cake and even though sorting and placing the millions of Smarties was quite time consuming, I actually found it really relaxing. I finished off the cake board with the birthday boy's name in fondant letters.


I also whipped up my all-in-one chocolate cupcakes and topped them with chocolate buttercream and some mini smarties. I made three batches of the buttercream to cover the cake and all the cupcakes.


Chocolate Fudge Cake
(adapted from Donal Skehan)
350g self-raising flour
5 tbsp cocoa powder
2 tsp bicarbonate of soda
300g caster sugar
300ml vegetable oil
300ml semi-skimmed milk
4 large eggs, beaten
4 tbsp golden syrup

Preheat your oven to 180ºC and line two square baking tins. Sieve the flour, cocoa powder and bicarb into the biggest bowl you have. (Or if you're lazy, like me, put them into the bowl and give it a good whisk). Add in the sugar and mix well. In a jug, measure in the oil, milk, eggs, syrup and mix. Make a well in the centre of the dry ingredients and gradually add in the wet ingredients until you have a smooth (and quite wet) mixture. Pour evenly between your baking tins and bake in the oven for about 30 minutes, or until a skewer comes out clean. Leave to cool slightly, before turning out onto a wire rack to cool completely.

Chocolate Fudge Cupcakes
(Makes 12 cupcakes)
150g butter, softened
150g soft light brown sugar sugar
3 medium eggs, beaten
125g self-raising flour
25g cocoa powder 
1 tbsp milk

Preheat the oven to 180ºC and line the cupcake tin. Place all ingredients in a bowl and beat until smooth. Spoon the mixture into the cupcake cases, about two thirds full. Bake for about 15 minutes, or until a skewer comes out clean. Cool on a wire rack.

Chocolate Buttercream
2 tbsp cocoa powder
2tbsp boiling water
150g unsalted butter, softened
225g icing sugar

Blend the cocoa powder and water to a paste and leave to cool slightly. Beat the butter until light and fluffy. Gradually add in the icing sugar until well combined. Add in the cocoa powder paste and beat once more. Spoon mixture into a piping bag and pipe onto your cooled cupcakes.

When your cakes have cooled completely, trim the edges and place side by side. Using cocktail sticks, pin a paper template to the cake, and carefully cut around it. Spread a thin layer of buttercream on top and gently place on the Smarties.

When the cupcakes have cooled, pipe on the chocolate buttercream and sprinkle over some mini Smarties. 

Sunday, 27 April 2014

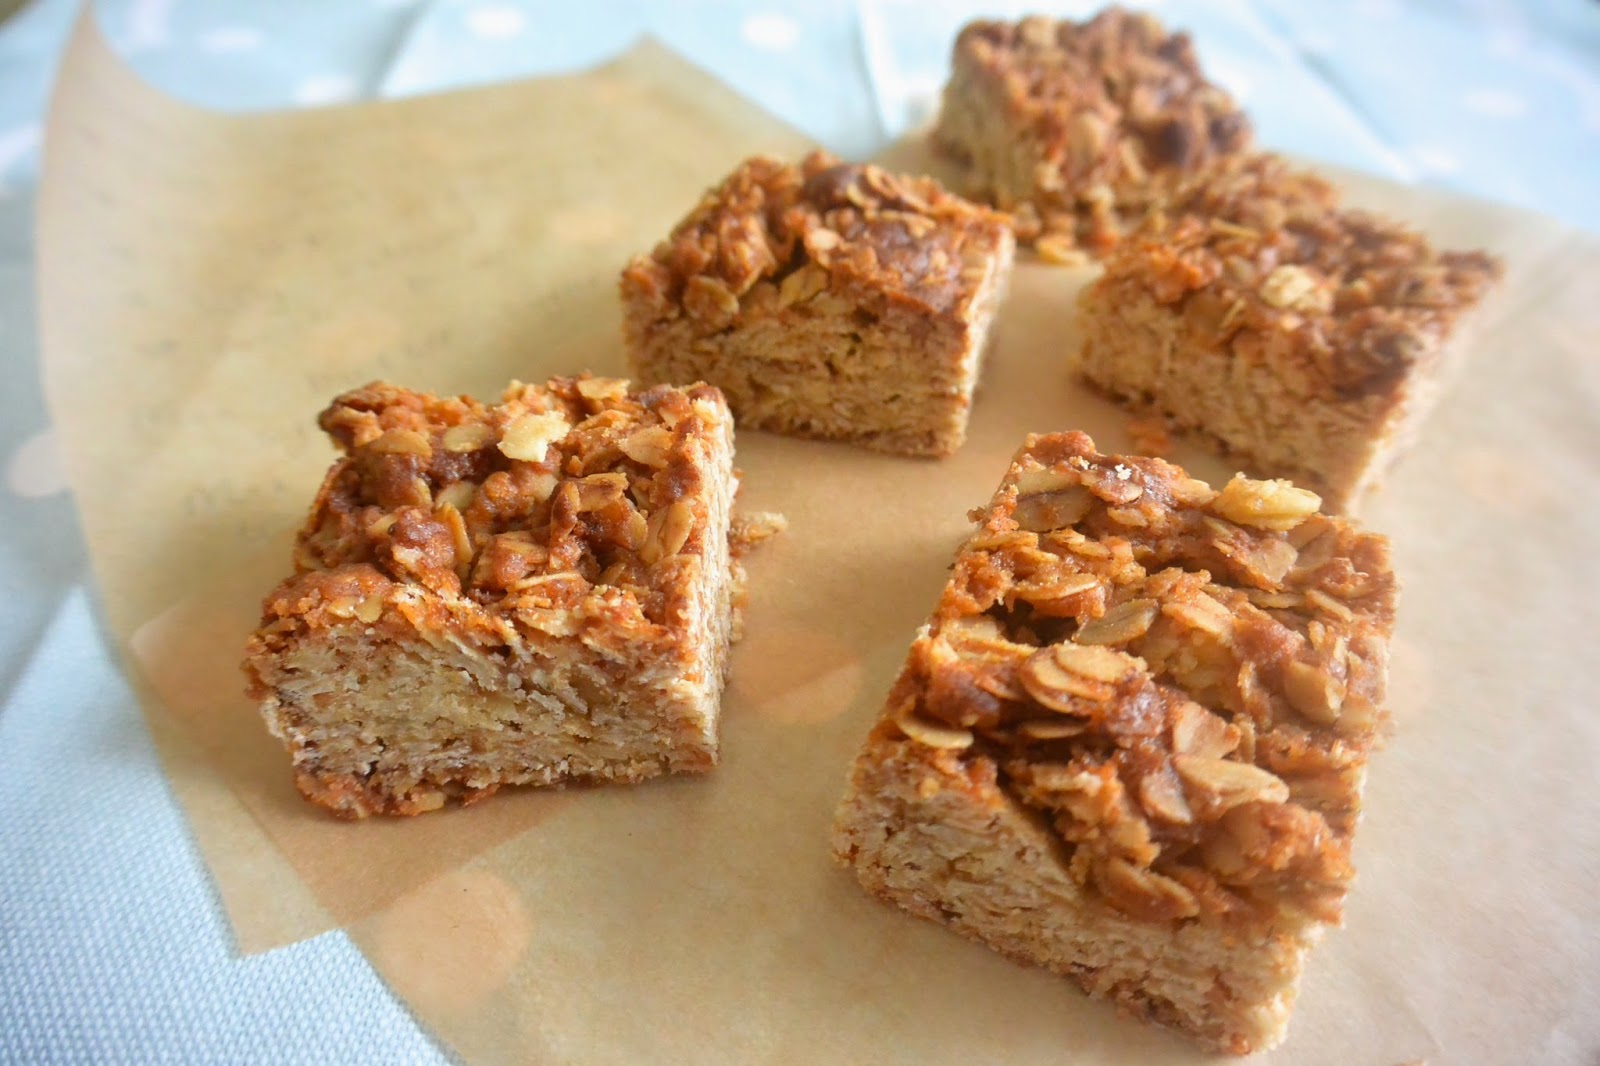
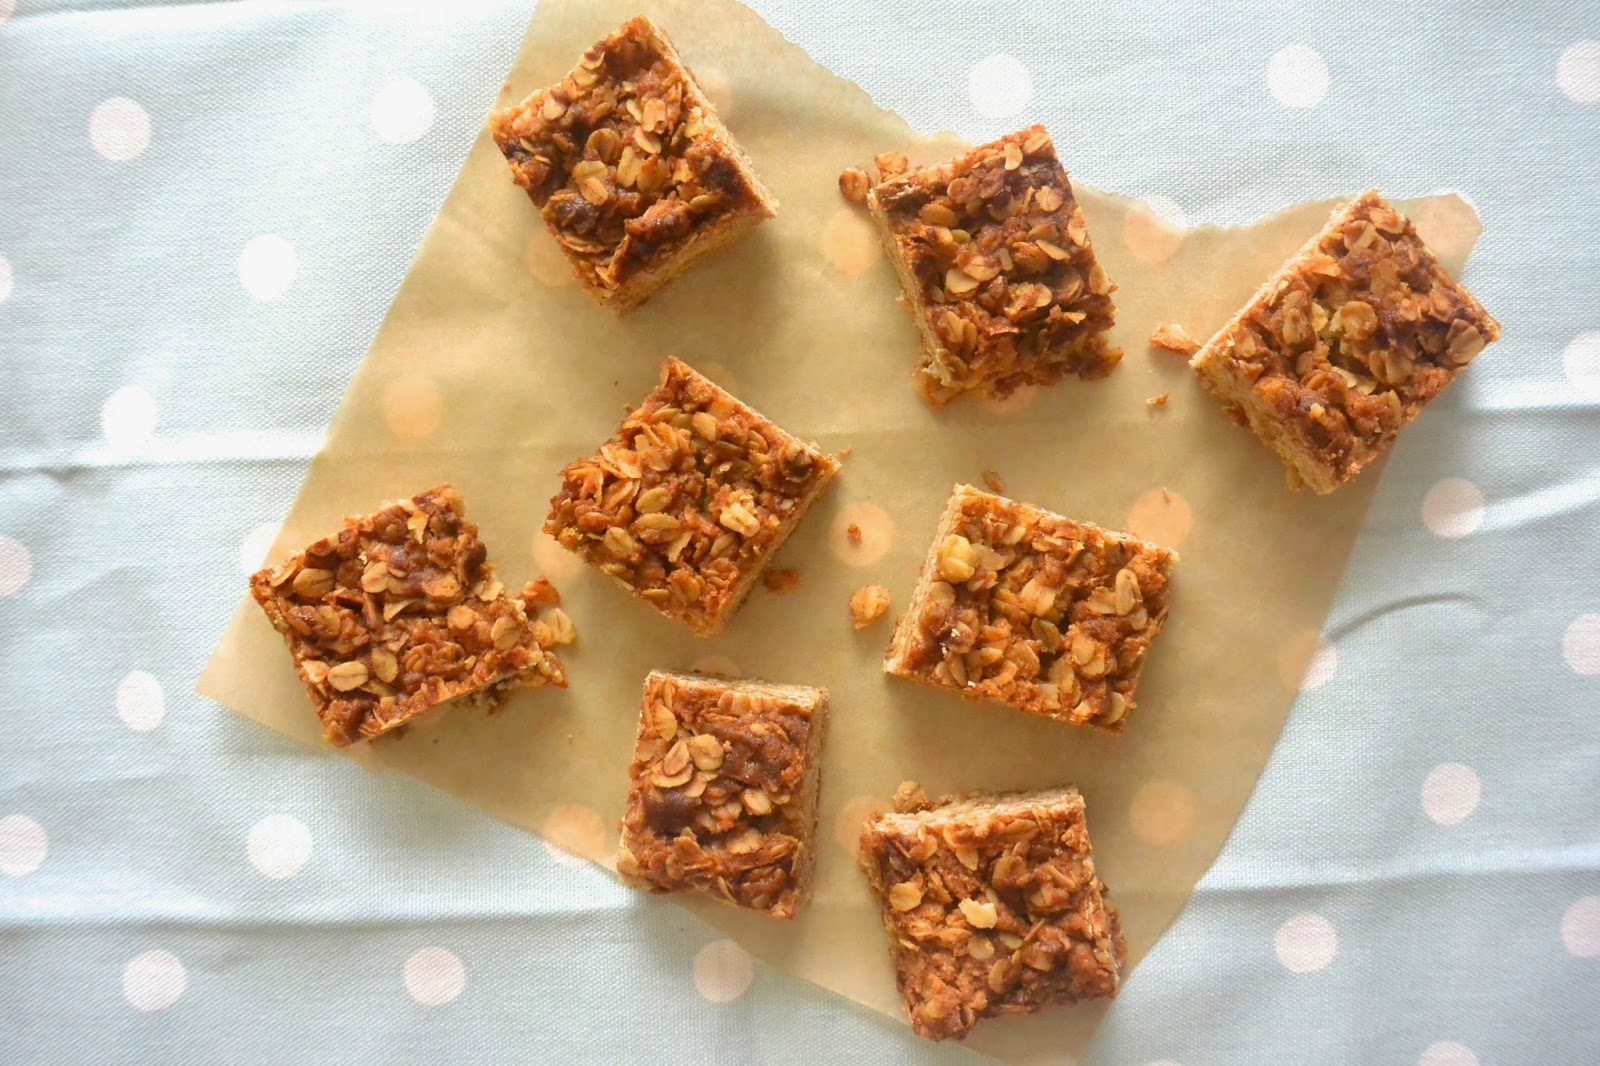
Flapjacks

I'm the first to admit that these aren't the prettiest thing to bake, but they are pretty damn tasty. I get a craving for them every now and again and can whip them up in about 30 minutes. It's very easy to trick yourself into thinking they're a healthy snack (if you forget about the butter, sugar and golden syrup) and the whole tray is usually gone in a couple of days.


This recipe was given to me by my friend Susan, and it can be jazzed up whatever way you want. I kept them plain this time, but depending on the occasion or what's in the house, you can also add M&Ms, chocolate chips, raisins, desiccated coconut (or anything else that you have lying around) and top with chocolate.
 

225g unsalted butter, melted
115g caster sugar
2 tbsp golden syrup
115g plain flour
300g jumbo oats
Pinch bicarbonate of soda

Line a baking tin with greaseproof paper and preheat the oven to 180ºC. Mix butter, sugar and golden syrup. Add in the flour, oats and bicarb and mix well. Stir in any extra fillings. Press into the baking tin and bake for 20-25 minutes, or until golden brown on top.

Sunday, 20 April 2014

Carrot Cupcakes

Happy Easter. I'm off to mum's for Sunday dinner so, of course, I said I'd bring something for dessert. 


I'm still not convinced that vegetables belong in a cake, but seeing as it's Easter I thought I'd give it another go! I used the same recipe as last time, with a few little changes. 


These cupcakes are so light and fluffy, and I love the cinnamon flavour in the cream cheese icing. I'm officially converted. I've even managed to eat two for breakfast.


This batch made 24 big cupcakes but I was seriously short on icing. I managed to spread it on about 18 of them before I ran out. I've adjusted the recipe below so you should have enough to cover them all.


(adapted from Donal Skehan)
275g self-raising flour
1/2 tsp bicarbonate of soda
2 tsp ground cinnamon
275g caster sugar
4 large eggs
250ml vegetable oil
1 tbsp vanilla extract
400g carrots, peeled and grated

Preheat your oven to 180ºC and line your cupcake tins. In a large bowl, sift in the flour, bicarb and cinnamon (or just give it a good whisk). In another bowl, beat together the eggs and sugar, until light and fluffy. Slowly pour in the oil, until completely incorporated and then add in the vanilla. Fold in the dry ingredients, until just mixed through. Finally, fold through the grated carrots. Divide the batter between the cupcake liners and bake for 15-18 minutes, or until a skewer comes out clean. Remove from the oven and leave to cool on a wire rack. 

Cinnamon Cream Cheese Frosting
400g cream cheese, softened
100g unsalted butter, softened
900g icing sugar
  4 tsp cinnamon
Beat together the cream cheese and butter, until light and fluffy. Gradually add in the icing sugar and cinnamon until well combined.

Wednesday, 16 April 2014

Easter Nests

This isn't really a recipe. Just something quick, easy and fun to make with kids around Easter time. I did these with my class. They were so excited to be "baking" and were so proud showing the end results to their parents.


Easter Nests
(makes about 30)
450g chocolate
Cornflakes
Mini Eggs

Melt the chocolate three quarters of the way in the microwave and then stir it to melt the rest (this prevents it from burning). Add in enough cornflakes to use up all the chocolate. Get the kids to mix it and, when they're finished, lick the spoons (this is the best part!). Pop some Mini Eggs on top and leave to set for about 30 minutes.

Sunday, 13 April 2014

Mini Cheesecake Easter Eggs

I've mentioned my favourite baking blog Raspberri Cupcakes before. The recipe that brought me to the blog (via The Londoner) was these cheesecake filled chocolate Easter eggs. That was about a year ago and I've been dying to make them ever since. Easter is just around the corner so I finally got my chance.


These were surprisingly simple to make. The hardest part was finding the hollow chocolate eggs. I looked everywhere and couldn't get proper egg-sized ones so ended up with smaller ones from Lidl. I'm actually really glad with the way it turned out, as they were perfectly bite-sized.


I made 48 eggs as I wanted to bring these into work as a pre-Easter holiday treat, and I also made some for mum. I had intended to swap the passion fruit curd for lemon curd, but as my eggs were so small I didn't want to waste the curd so just went with some simple yellow icing to make the "yolk".


(adapted from Raspberri Cupcakes)

Cheesecake Filling
300g cream cheese, softened
60g icing sugar
4 tsp lemon juice
250ml double cream

Beat the cream cheese, icing sugar and lemon juice together. In a separate bowl, whip the cream until stiff peaks form. Gently fold the cream into the cream cheese mixture. 

Lemon Icing
50g icing sugar
1 tsp lemon juice
 Yellow food colouring

These quantities are just a guideline. I started with the amount above and then judged it by eye to get the right consistency, adding in a little bit of icing sugar or lemon juice at a time.  And then when I was happy with the consistency, I added in a few drops of yellow food colouring.

Pipe the cheesecake mixture into your hollow chocolate eggs. I used old egg cartons to hold everything upright. Then pipe a dot of lemon icing on top.

Wednesday, 9 April 2014

All-In-One Vanilla Cupcakes

Last week I made a Very Hungry Caterpillar cupcake cake for my friend's son's first birthday party. As it was my first 'commissioned' cake, I was taking no chances and used some of my favourite recipes. Check out the cake and cookie recipes.


The cupcake recipe I used is one of my all time favourites, as it it just so quick and easy to make. You literally pop all the ingredients in a bowl and beat. The buttercream takes a little bit more work, but it's totally worth it!! For this cake, I doubled the cupcake recipe to make 24 large cupcakes and trippled the buttercream recipe to cover all the cupcakes, the cake for the face of the caterpillar and a mini smash cake for the birthday boy as well.


250g caster sugar
250g butter
4 eggs
250g self-raising flour
2 tsp vanilla extract

Preheat the oven to 180ºC and line a cupcake tin with cases. Place all the ingredients in a large bowl and beat for about 2 minutes until smooth. Fill the cupcake cases three quarters of the way up and bake for about 15 minutes, or until a skewer comes out clean. Leave to cool on a wire rack. 

Vanilla Buttercream
250g unsalted butter, softened
450g icing sugar
2 tbsp hot water
2 tsp vanilla extract
Food colouring (optional)

Beat the butter until light and fluffy. Beat in half the icing sugar with the water. When combined, beat in the other half of the icing sugar with the vanilla until smooth. Add in any food colourings. Pipe onto your cooled cupcakes.

Sunday, 6 April 2014

The Very Hungry Caterpillar Cupcake Cake

Move over Rainbow Cake, I've a new favourite cake. This was my first 'commissioned' cake that I was asked to make for a friend's son's first birthday. The party was 'The Very Hungry Caterpillar' themed, so we searched Pinterest, and decided on a cupcake cake. I then added some fruit cookies to jazz up the cake board.


The cake is a four-layer vanilla rainbow cake, covered in a thin layer of vanilla buttercream and red fondant. The cupcakes are also vanilla with the same vanilla buttercream coloured various shades of green. And the cookies are brown sugar cookies covered in fondant.


I wasn't taking any chances on this cake, so I turned to old favourite recipes. The cake and cookie recipes have featured on the blog before. The cupcakes haven't, but I left my recipe book at mum's house so I'll pop up the recipe during the week.

Sunday, 30 March 2014

Chocolate Pinata Cake

I made this cake a couple of weeks ago for a few of my friends in work! I wanted to make something that was a little bit crazy so pretty much just put as much chocolate as I could in one cake.


I  adjusted Donal Skehan's Ultimate cake to make a three layer cake. Then I sandwiched and filled it with chocolate buttercream. I surrounded the cake with lots of Kit Kats and topped it with Malteesers. There's also some M&Ms hidden inside the cake. Seriously, you will probably need the dentist after this one!!


To make the Pinata part of the cake, I cut a circle out of the middle layer and filled it with M&Ms before stacking. I was hoping they'd fall out when the cake was cut, but they kinda just sat there. Maybe there was too much buttercream? But the element of surprise was still there! And the cake was demolished quicker than any cake I've ever made!


Chocolate Fudge Cake
(adapted from Donal Skehan)
265g self-raising flour
3 1/2 tbsp cocoa powder
1 1/2 tsp bicarbonate of soda
225g caster sugar
225ml sunflower oil
3 large eggs, beaten
3 tbsp golden syrup

Preheat your oven to 180ºC and line three baking tins. Sieve the flour, cocoa powder and bicarb into the biggest bowl you have. (Or if you're lazy, like me, put them into the bowl and give it a good whisk). Add in the sugar and mix well. In a jug, measure in the wet ingredients (oil, milk, eggs, syrup) and mix. Make a well in the centre of the dry ingredients and gradually add in the wet ingredients until you have a smooth (and quite wet) mixture. Pour evenly between your baking tins and bake in the oven for about 40 minutes, or until a skewer comes out clean. Leave to cool slightly in the tins, before turning out onto a wire rack to cool completely.

Chocolate Buttercream
2 tbsp cocoa powder
2 tbsp boiling water
150g unsalted butter, softened
225g icing sugar
 
Blend the cocoa powder and water to a paste and leave to cool slightly. Beat the butter until light and fluffy. Gradually add in the icing sugar until well combined. Add in the cocoa powder paste and beat once more.
 
To assemble the cake, cut a circle out of one of the cakes. I used a plate and cut around it. Place one cake on a cake board and spread a thin layer of buttercream on top. Place the cake with the hole on top spread a thin layer of buttercream on top. Fill the hole with M&Ms and place the final cake on top. Cover the whole cake with buttercream. Gently place the Kit Kats around the side and the Malteesers on top. Tie with a bow to help keep the Kit Kats in place.
 

Sunday, 23 March 2014

Chocolate Pavlova

The other day, something very strange happened. I had a whole box of eggs in the fridge that were about to expire. I needed something to use up all six eggs, that I could make relatively quickly so I turned to my favourite dessert: Pavlova.


I have loved pavlova for as long as I can remember. It is, without a doubt, my favourite thing to eat. But, I am very picky. The outside has to be crisp and the inside has to be gooey.


One of the girls in work made Nigella's Chocolate Pavlova a few years ago, and I was instantly obsessed. I went home and tried it out straight away for myself and since then there has been no looking back. It is meringue just as I like it: crisp and gooey. But the best bit has to be the hidden chocolate chunks folded through the meringue.


I made this for my friend once, who was quick to inform me that she doesn't really like pavlova. I left the room for five minutes and when I came back half the thing was gone. That has to be a good sign, right?!?!


Chocolate Pavlova with Whipped Cream and Strawberries
(adapted from Nigella Lawson)
6 large egg whites
300g caster sugar
3 tsp cocoa powder
1 tbsp balsamic vinegar
50g dark chocolate, chopped
500ml double cream
300g strawberries
10g dark chocolate, grated

Line a baking tray and preheat the oven to 180ºC. Beat the egg whites until soft peaks form. Add the sugar, a tablespoon at a time, until fully combined and the meringue is stiff. (You should be to hold the bowl upside down over your head without the meringue falling out!) Add the cocoa, balsamic and chocolate and gently fold through. Mound the meringue onto your lined baking tray, making the edges a little bit taller. (This will hold in your cream and fruit.) Place in the oven and immediately reduce the temperature to 150ºC and cook for approximately and hour. The meringue should be crisp to the touch, but you know that if you press too hard it will crack. Leave the meringue in the oven, with the door opened slightly, to cool completely. (This part is very important!) When it is cool, whisk the cream until thickened and gently spread it on top of the meringue. Either scatter or place your strawberries on top and sprinkle over the grated chocolate.

Sunday, 16 March 2014

Happy St. Patrick's Day

I'm not one to turn down an occasion to bake for, and Paddy's Day is no exception. Although I point blank refused to do something green. Instead I went with another stereotypical image of Ireland: Guinness. 


After a bit of Googling, I decided to go with Nigella's Chocolate Guinness Cake recipe, but in cupcake form. Nigella's recipe makes one single layer 9" cake, so I figured I'd get 12, maybe 16 cupcakes. I actually got 36 and ran out of icing after 12. So I've adjusted the recipe below to make 16 cupcakes, with icing. 


I was skeptical of how these would turn out, because I absolutely hate the taste Guinness. But, I was really surprised with the results. The cupcakes were light and fluffy, and they had a slight bitterness to them which went lovely with the cream cheese frosting. Maybe it wasn't such a bad thing that I accidentally made too many cupcakes!!


Chocolate Guinness Cupcakes with Cream Cheese Frosting
(adapted from Nigella Lawson)

Chocolate Guinness Cupcakes
125ml Guinness
125g unsalted butter
40g cocoa powder
200g caster sugar
70g sour cream
1 large egg
1/2 tbsp vanilla extract
135g plain flour
1 1/4 tsp bicarbonate of soda

Preheat your oven to 180ºC and line a cupcake tin. Pour the Guinness into a saucepan and add the butter. Heat until the butter is melted. Remove from the heat and whisk in the cocoa and sugar. Beat the sour cream, egg and vanilla together and add to the mixture. Finally, whisk in the flour and bicarb. Pour into your cupcake cases, filling about 3/4 of the way up and bake for about 12-15 minutes, or until a skewer comes out clean. Leave to cool on a wire rack.

Cream Cheese Frosting
450g cream cheese
225g icing sugar
185ml double cream

Beat the cream cheese until light and fluffy. Gradually, add in the icing sugar until completely incorporated. Add the cream and beat until it makes a spreadable consistency. 

Sunday, 9 March 2014

Lemon Meringue Pie

Last week I introduced you to Cake Thursday. As well as bringing in that GIANT of a cake, I tried to make a slightly more sophisticated dessert. Was it sophisticated? Probably not! But was it tasty? Most definitely.


In true Jennifer style, this dessert included many firsts. My first time making pastry from scratch and my first time making lemon curd. What's life without a bit of experimenting, eh?


My oven did it to me again!! Burnt half of the bleedin' meringue!! But in the end, it didn't matter. The pastry was buttery and crumbly, the curd was nice and tart, and the meringue was gooey in the middle with a crisp outside. I was insanely proud of this one. Go me!!


(adapted from Donal Skehan)

Pastry
200g plain flour
150g cold butter, diced
1 tbsp caster sugar
1 tbsp cold water

Rub the flour and butter together until the mixture resembles breadcrumbs. Stir through the caster sugar and water until the mixture comes together to form a ball. Press into a flat oval and cover with cling film. Rest in the fridge for 15 minutes.

Preheat the oven to 180ºC. Dust the work surface with flour and roll out pastry to approximately 3mm. Line the tin with the pastry and press into the sides before trimming the edges. Prick the base with a fork all over and line with foil, shiny side down. Fill with baking beans and blind bake for about 15 minutes until the pastry is a light golden brown. Remove from the oven, lift out the beans and foil and allow to cool on a wire rack.

Lemon Curd
300g caster sugar
100g cornflour
Grated zest of 4 lemons
120ml lemon juice
450ml cold water
4 large egg yolks
60g butter, diced

Place the sugar, cornflour, lemon juice and zest, and water in a large saucepan and whisk to combine. Add the egg yolks and mix thoroughly. Place the saucepan over a medium heat and bring to a boil, stirring continuously until thickened. When it is thick, stir through the butter, then remove the pan from the heat and allow to cool.

Meringue
4 large egg whites
250g caster sugar
1 tsp vanilla extract

Whisk the egg whites until stiff peaks form. Gradually add the sugar until it is fully combined and you can hold the bowl over your head without the meringue falling out, then add the vanilla extract.

Place the cooled pastry, in its tin, on a baking sheet. Fill with the lemon curd and then spoon the meringue mixture on top. Bake in the oven for about 20 minutes. Leave to cool slightly before serving.

Sunday, 2 March 2014

Chocolate Orange Checkerboard Cake

Let me introduce you to Cake Thursday. It happens once a month. We have a rota in work, and the last Thursday of every month four or five people bring in cake and we stuff our faces until we can't eat any more. It's a very special day.


This month was my turn. I've been dying to try out a checkerboard cake for ages, so thought that this was the perfect time to experiment! I found a great recipe online, that just happened to include my two favourite flavours: chocolate and orange. I've never been so nervous about a cake, but I'm actually really pleased with how it turned out. And the GIANT cake disappeared by the end of the day, which is always a good sign!!


Orange Cake
2 1/2 cup self-raising flour
1 3/4 cup caster sugar
3 large eggs
1 1/4 cup milk
100g butter, melted
1/4 cup vegetable oil
Zest and juice of 1 orange

Preheat the oven to 170ºC and line two round cake tins. Place all ingredients in a bowl and beat until smooth. Divide the mixture evenly between the two tins. Bake for approximately 40 minutes, or until a skewer comes out soon. Leave to cool in the tins for about 10 minutes, before transferring to a wire rack to cool completely.

Chocolate Cake
2 1/4 cup self-raising flour
1/4 cup cocoa powder
1 3/4 cup caster sugar
3 large eggs
1 1/4 cup milk
100g butter, melted
1/4 cup vegetable oil
Zest and juice of 1 orange

Preheat the oven to 170ºC and line two round cake tins. Place all ingredients in a bowl and beat until smooth. Divide the mixture evenly between the two tins. Bake for approximately 40 minutes, or until a skewer comes out soon. Leave to cool in the tins for about 10 minutes, before transferring to a wire rack to cool completely.

Chocolate Frosting
375g butter
45g brown sugar
3/4 cup boiling water
600g dark chocolate, chopped

Combine the butter, sugar and water in a large saucepan and cook until the butter is melted and the sugar is dissolved. Remove from the heat and add the chocolate. Stir until all the chocolate is melted. Chill until spreadable.

To assemble the cake, you can use this template. I actually used a saucer and a cutter and found it surprisingly simple. From your four cakes, you should have four large circles, 4 medium circles and 4 small circles. Then you need to slot them together. Have a look at this tutorial. Take a large chocolate circle and spread chocolate frosting on the inside. Place a medium orange circle inside and spread on more chocolate frosting. Then place a small orange circle inside that. Repeat with all cakes, alternating the colours. Stack the cakes on top of each other, sandwiching with chocolate frosting and alternating the colours. Cover the top and sides with chocolate frosting.

Sunday, 23 February 2014

Carrot Cake with Cinnamon Cream Cheese Frosting and Caramelised Walnuts

Until this week, I had never made a carrot cake before. I had never even tasted a carrot cake before! I don't know why, but the idea of vegetables in a cake just seemed completely wrong to me. I'm off work this week, so was in a mood to do something different, something I'd never tried before. I was going to visit my friend in her new house and, for some reason, carrot cake just seemed like the 'homely' cake to make.


I searched through my baking books and found a few different options, but in the end I went with a recipe from Donal Skehan's Kitchen Hero: Great Food for Less. I'm a huge fan of Donal's, both of his books and his tv shows, and have made both sweet (check out his 'Ultimate' cake) and savoury recipes of his to great success, so knew that I wouldn't go too wrong with this one!


 I was pleasantly surprised with the end results, although I had to rely solely on my friends to let me know if it actually tasted like carrot cake should. They said it did, so guess I'll just have to trust them!!


(adapted from Donal Skehan)
275g self-raising flour
1/2 tsp bicarbonate of soda
2 tsp ground cinnamon
275g caster sugar
4 large eggs
250ml rapeseed oil
1 tbsp vanilla extract
400g carrots, peeled and grated

Preheat your oven to 180ºC and grease and line two cake tins. In a large bowl, sift in the flour, bicarb and cinnamon (or just give it a good whisk). In another bowl, beat together the eggs and sugar, until light and fluffy. Slowly pour in the oil, until completely incorporated and then add in the vanilla. Fold in the dry ingredients, until just mixed through. Finally, fold through the grated carrots. Divide the batter between your two lined tins and bake for 30 minutes, or until a skewer comes out clean. Remove cakes from the oven and leave to cool for about 10 minutes on a wire rack. Remove the cakes from the tins and leave to cool completely.

Cinnamon Cream Cheese Frosting
(adapted from Donal Skehan)
200g cream cheese, softened
50g unsalted butter, softened
450g icing sugar
2 tsp cinnamon

Beat together the cream cheese and butter, until light and fluffy. Gradually add in the icing sugar and cinnamon until well combined.

Caramelised Walnuts
1 cup walnuts
1/2 cup light brown sugar

Line a baking tray with parchment paper. Add the nuts and sugar to a non-stick pan and stir constantly until all the sugar has melted and the walnuts are covered in a golden caramel. Pour the nuts onto the baking tray and leave to cool. 

Assemble the cakes by spreading half of the cream cheese frosting onto one of the cakes with a large palette knife. Gently place the second cake on top and cover with the remaining frosting. Top with the caramelised walnuts.

Monday, 17 February 2014

Valentine's Sugar Cookies

As I've mentioned a few times before, I teach four and five year olds. I wanted to do something a bit different with them for Valentine's Day, so we baked cookies!!  The recipe is a simple one, perfect for baking with children. The cookies are crisp on the outside and slightly soft in the middle and they keep their shape really well when baking.


I used to make these all the time as a kid and loved decorating them with whatever I could get my hands on! We used pink glacé icing and all the sprinkles I could find to decorate these, but unfortunately they were scoffed before I could take a picture!!


225g plain flour
125g butter, softened
125g brown sugar
1 egg, beaten
Pinch of salt

Line a couple of baking trays and preheat your oven to 190ºC. Beat the butter and sugar together until fluffy. Beat in the egg, slowly.  Sift in the flour and salt. Mix well until it makes a firm dough. You may need to add a little bit more flour.  Sprinkle some flour on your work surface and a rolling pin. Roll out the dough until it is about 1/2 cm thick. Cut out your shapes and place on the baking tray. Gather up any leftover dough, roll it out again and cut out more shapes. Keep on going until all the dough is gone.  Bake for about 15 minutes, until light brown. Leave on a wire rack to cool completely before decorating.

Hidden Heart Cake

I wasn't going to show you this cake. Everything that could go wrong with this cake, went wrong. It was not a great day in the kitchen. But I decided to show it to you all anyway, because everything in life doesn't always go exactly as you plan!!


It started off okay. I baked the first cake, the pink one, which turned out lovely. Left it to cool, sliced it up and cut out my hearts. And then it all went downhill. I poured some of the white mixture into the tin, and added the hearts. But they started moving all over the place, and wouldn't line up straight. Then as I poured over the remaining mixture and tried to smooth it out, I just knew it wasn't going to turn out right.


I'm pretty sure I've said it before, but my oven is seriously out to get me!! The top of the cake started to burn, and the inside was still completely raw.  I left it to cook through and then cried taking it out of the oven. I tried to scrape off as much of the burnt top as I could and then covered it with neon glacé icing to try and hide the mess!!

 
Then came the moment of truth: the slicing. One side didn't work at all!! But the other side actually looked alright. The inside was just slightly underdone. I was planning on bringing it in to work for the staff, but I just couldn't bring myself to serve it to grown ups. So instead, I gave it to my class of 4 and 5 years olds. And they loved it!! I love how easily impressed kids are...


Has anyone else out there tried this before? If you have, please let me know where I went wrong!! I am determined to remake this cake. I promise to let you know how it goes!!


6 large eggs
340g self-raising flour
340g caster sugar
340g unsalted butter, softened
1 tsp vanilla extract
2 tsp baking powder
Red food colouring

Preheat oven to 180ºC and line two loaf tins. Put cake ingredients in a bowl and beat until smooth. Split mixture into two bowls and add a drop of red food colouring to one. Pour the pink mixture into a cake tin and bake for 30-35 minutes, or until a skewer comes out clean. Leave to cool completely.  When cooled, slice the cake into 1cm slices. Use a heart shaped cutter to cut a heart out of each slice. Pour 1/3 of the white mixture into the second loaf tin. Place the pink cake hearts into the tin, standing upright. Pour over the remaining mixture. Bake for 30-35 minutes, or until a skewer comes out clean. Leave to cool.

Glacé Icing
220g icing sugar
2 tbsp hot water
Red food colouring

Mix together the icing sugar, hot water and a drop of red food colouring to make the icing. Poor over the cooled cake.